DIY Dollhouse Dolls

Many eons ago - we're talking mid 90s if the clothing styles are any clue - I developed a fully articulated doll made from polymer clay, strung together with pipe cleaners, and clothed in fabric scraps. I made these primarily for my own benefit, and to add to my grandmother's doll house once I inherited it, but after showing them off at church I ended up actually making a set on commission for an elderly friend. If memory serves, I asked for all of $20 for three dolls, which was nuts, but then again, I've never been good at charging what my skills and time are worth!
Anyway, the reminiscing here is leading up to the present day when my now 7 and 9 year old daughters have been permitted to play with Grammy's doll house. They like my dolls - although they pronounced some of their faces "creepy," and I cannot entirely disagree. I learned the basics of facial sculpting from an old craft book I splurged on at the craft store. (I'd love to give you title and author, but those details are lost to time.) Anyway, it's not easy. Mine ended up very "cheeky" on average, with slightly protruding eyeballs, large noses, and lips just a little "off." But they've got a funky sort of cute all their own. And apparently my 9 yo daughter didn't think they were Too creepy, because she asked if I'd help her make one (read: if she could help Me make one) this afternoon that looked like her.
Let me warn you up front: this is not a quick-and-dirty project. It is dirty, but it isn't quick. It also isn't for the faint of heart. But the results are a lot of fun, so if you have some preexisting skills with sculpting, especially polymer clay (Fimo, Sculpy, etc, I feel like it's totally worth it.
Time: 90-120 minutes exclusive of clothing
Skill Level: Moderate to Hard.
(If you are interested in a beginner-level Fimo sculpting project, check out Easy Polymer Pastry Pendants)
Sculpting skills needed: Form spheres and "snakes." Form clay around an armature. Build up features and blend pieces together. Add tiny details.
Other skills needed: Basic hand sewing, understanding of simple clothing design - i.e doll clothes.

Materials needed:

- Polymer clay * in several colors including your choice of flesh tone and hair tone, underwear and shoes, white and eye color.
- Scraps of fabric for clothing
- Tin foil (optional)
- pipe cleaners, flesh or white color preferable
Tools needed:
- Toothpicks (critical) and other sculpting tools of choice
- X-acto knife or box cutter
- Baking tray (dedicated, or cover with tin foil) and oven
- Garlic press (dedicated) or play-doh extruder toy for hair (optional, we did without.)
- Hand-sewing tools such as needle, thread, scissors.
- Glue, for instance E-6000
Sculpting your Doll
My doll breaks down to head, hands, feet, torso, pelvis, upper and lower arm "beads," and upper and lower leg "beads."
If you're like me, you're going to get about 90% of your information from the photos, and all my hard work trying to put things into words will be largely wasted. So I'll try to keep it minimal!

1. Form the head.
If desired, form around a small marble-sized ball of tinfoil to save clay and bake-time. Mount on a toothpick for the remaining steps.
2. Add features. (Don't forget the ears!)
I decided to go with "lips" made from very flat pancakes blended onto the head, bottom lip first. Then add the nose and eyes. I did not add cheeks to this doll and I'm happier with her than some others. Blend, blend, blend using a toothpick.
Can this be simplified? Absolutely. Go ahead and carve a mouth, add a teensy button of a nose, and simple black eyes. Maybe something like this idea from Pinterest.
Or go full kawaii and leave out the nose and/or mouth entirely. If this is the only part of the project you don't think you can pull off, go ahead and simplify. You may like the results!

3. Add hair.
Not going to lie: this is nearly as tricky as the facial features. Most of my old dolls have carefully placed strands of extruded hair. But I have no idea where to look for that old garlic press, and my daughter suggested a ballerina bun as an alternative.
I don't have a lot of tips here except to form it in at least two pieces, and add texture with a sewing pin or your knife.

4. Form the torso and shoulders.
I built around a small ball of tinfoil. I decided to have my doll in an undershirt. I formed the whole thing in pink, scooped out just a little bit at the neckline, and then blended in some flesh colored clay. Finally I blended a little More pink over that to get the shape of the undershirt's neckline just right.
Once formed, carefully drive a toothpick through from top to bottom ("spine") and from left to right at the shoulders. Don't forget, or you will have to drill your doll before you can string her together!
5. Form the pelvis.
Again, underwear is an obvious choice here. The design is a simple rounded triangle.
Drive two holes through with your toothpicks, joined in the center.

6. Now, the easy stuff! Start building the limbs.
My adult sized dolls had elbow and knee "beads" in addition to upper and lower arms and legs. This doll is child sized and I left them out.
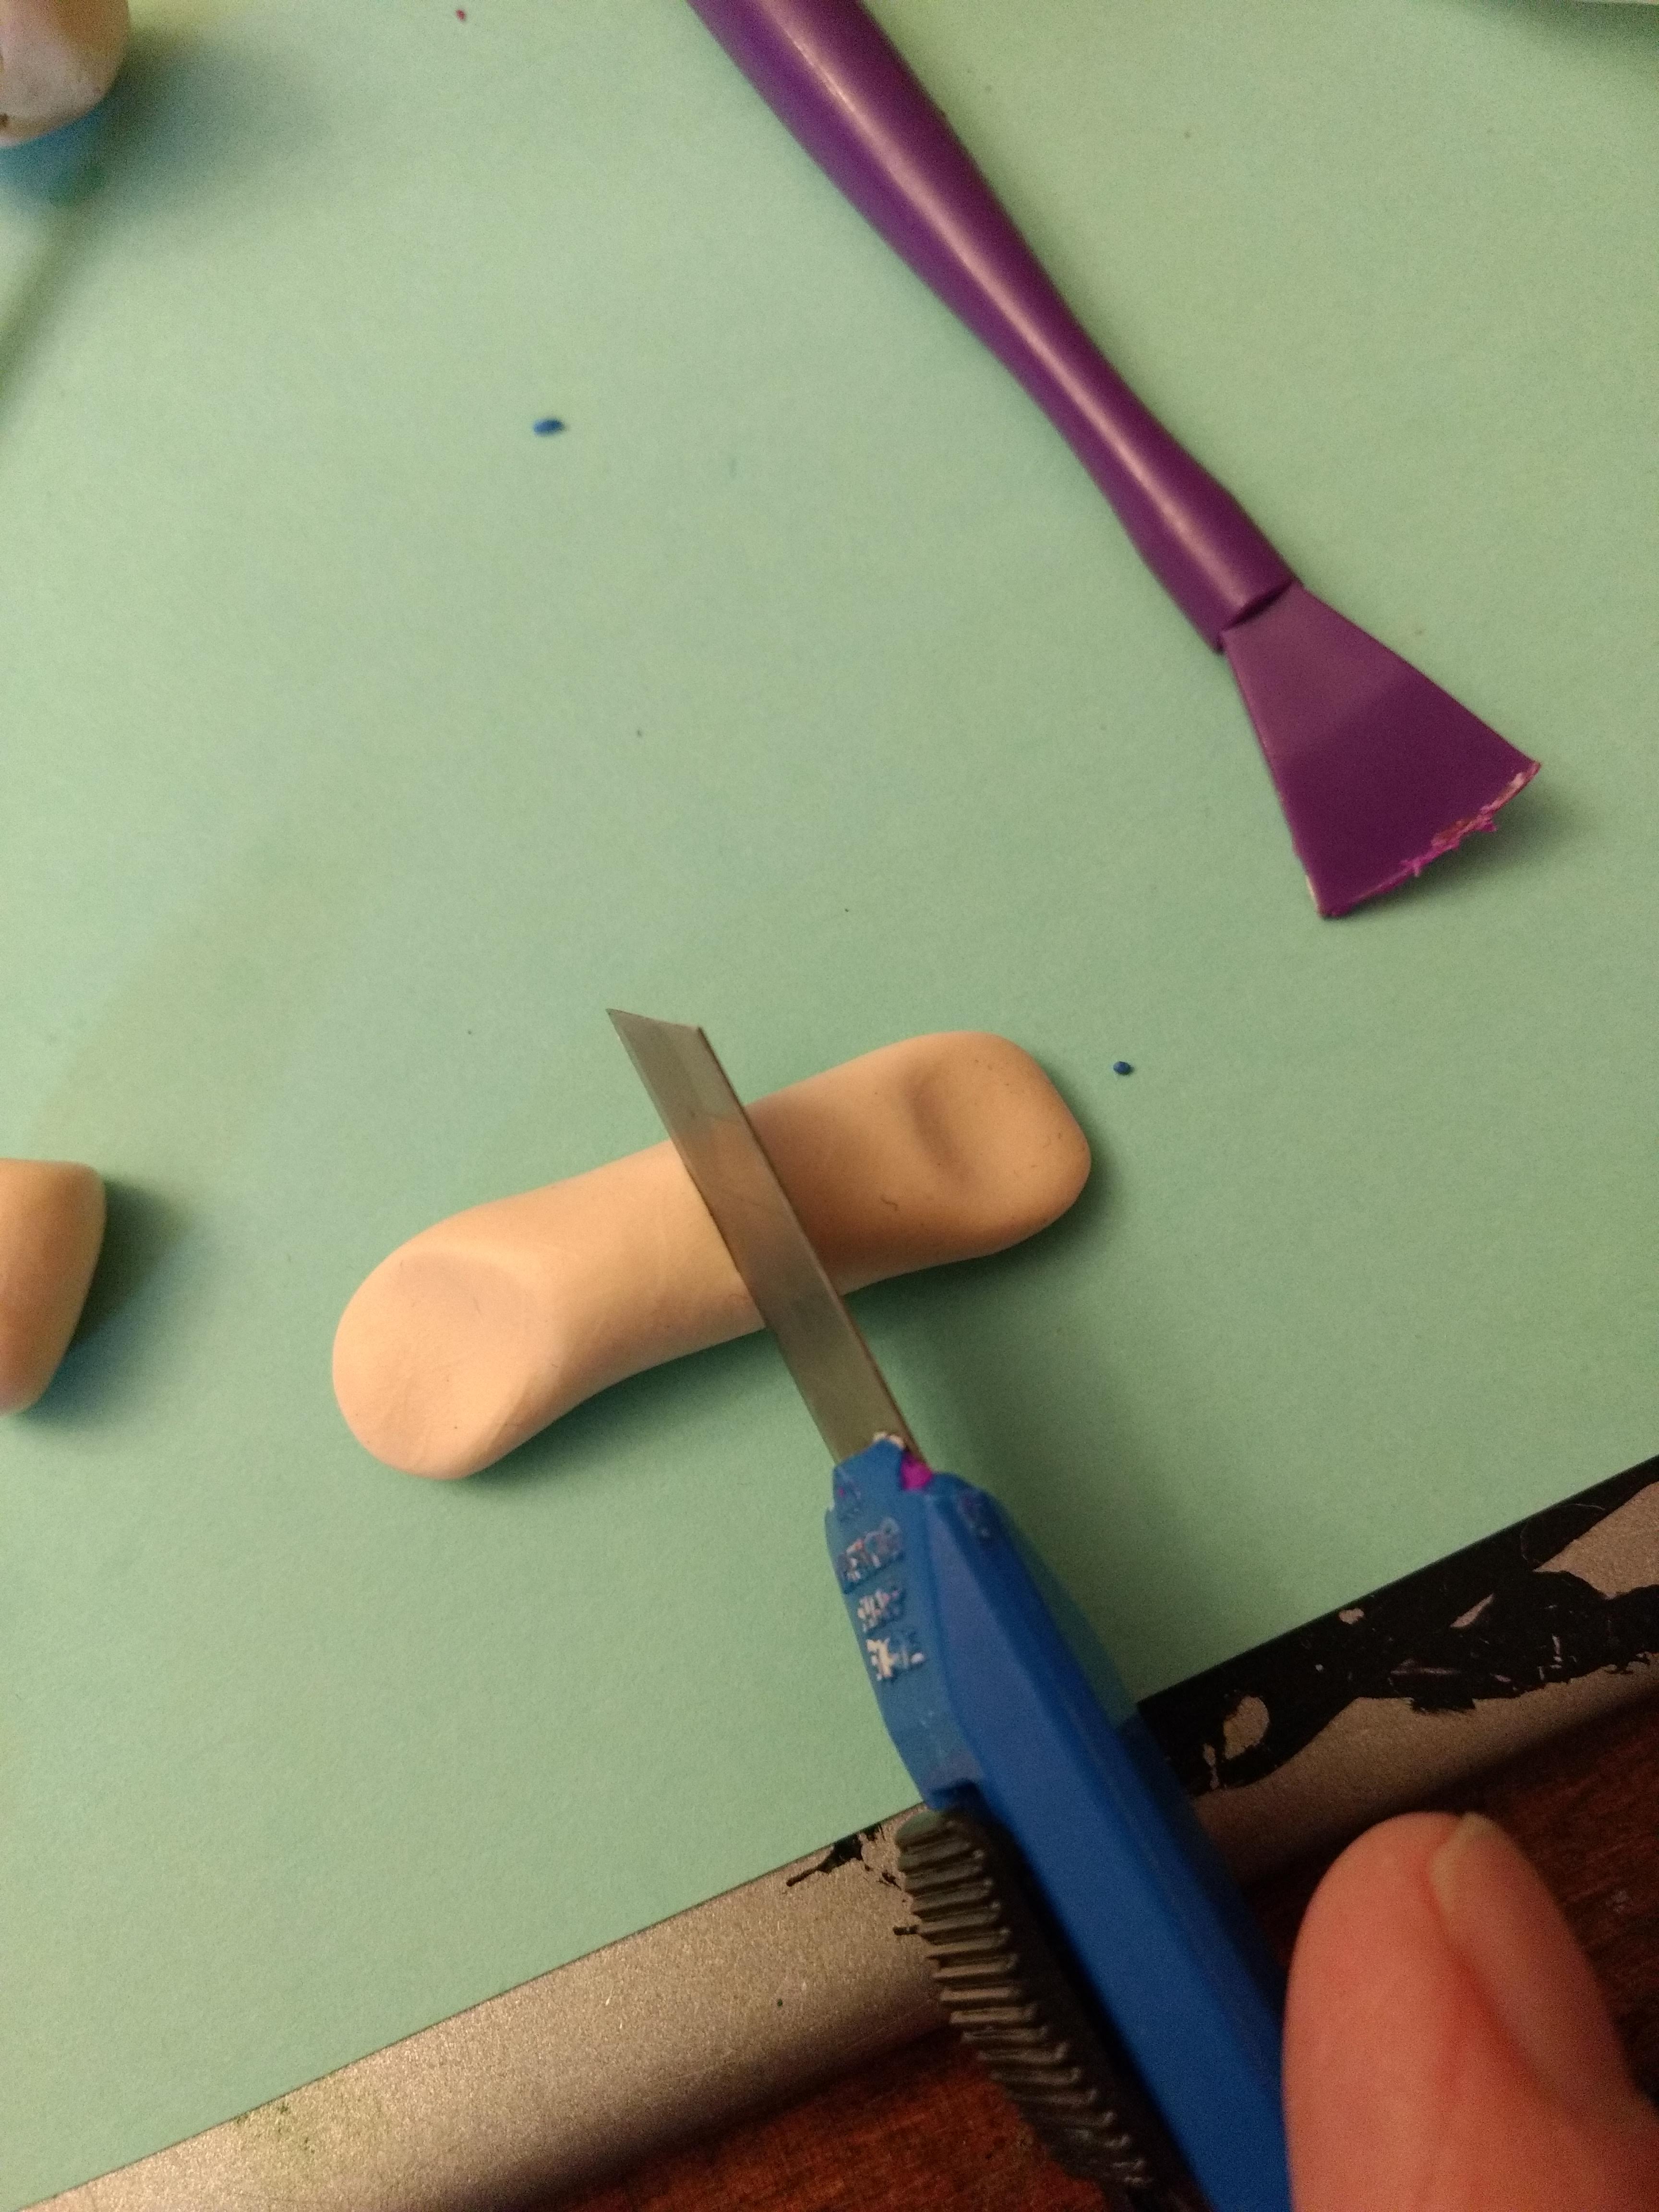
Tips: To make sure my left and right arms and legs match, I form them at the same time from one log of clay. I get the shape right, and then use my knife to cut them exactly in half.
Don't forget to thread them onto a toothpick!
I also add divots / indentations at the top of the arms and legs to match the torso and pelvis angles.
7. Hands!
As with other features that need to match left-and-right, make a ball double the size you need and cut it in half. Scoop it into a mitten shape and pull out a thumb. Finally, use your knife to gently slice the fingers. Don't forget you need a right and a left!
Mount them at the end of your toothpicks and form a decent wrist around the shaft. These are the trickiest to get to stay on the pipe cleaner, so the deeper the hole you can make, the better.

8. Shoes can be a challenge.
Tip: Make a nice ball of clay double the size of your shoes. Made it a bit oblong, then slice it in half to give yourself two flat "soles." Add details from there.
Tip: If you go ahead and make them reasonably blocky and boxy there's a good chance you'll be able to get your doll to stand.

9. OK, you've got everything. Time to bake!
Double check that everything has holes. I go ahead and bake them on the toothpicks to keep organized and un-squished.
Learn from my mistake and get yourself a nice big lump of tinfoil. Mount your head upright on its toothpick neck here instead of laying it flat. (My doll ended up with a squished ear.)
Follow the baking instructions on your polymer clay package. I baked the smaller pieces for 20 mn at 275, and added 5 more minutes for the head and torso.
Like the package says, Do NOT over-bake. It smells awful, and it discolors. You don't have to be precise down to the second, but don't forget about it in there!
Assembling the doll

I run one pipe cleaner from the neck through the spine and down through the first leg hole in the torso. String the leg beads, then make sure you have enough "give" in your spacing that you can flex your neck and knee. Cut off and add the first shoe.
Attach the second pipe cleaner at the waist between torso and pelvis, then run it through the other leg hole. Repeat steps above.
Run the last pipe cleaner straight across the torso and string the arms. Again, make sure you have sufficient give to flex elbows and wrists. Cut off the wire and add the hands. (We'll want to glue these, but wait until you make the clothes, trust me!)
Now that the doll is assembled, see if you can get her to stand, and make any minor adjustments.
Making the clothes
A full tutorial on pattern drafting and doll clothes sewing is beyond the scope of this project. I'm going to assume you have some experience and skills. But I will definitely give you some tips!
* Stretchy, light, no-fray fabric - like a T-shirt - is your friend.
* I always go with a simple T-shaped shirt or dress. Nothing complicated or fancy. And neither the head nor hands need to fit through: that's why we haven't glued yet!
* Draft a simple pattern by folding a sheet of paper in quarters. Lay your doll as shown, and draw with a 1/2 inch (ish) margin. Cut into a T. Transfer to your fabric. Sew. Snip a tiny hole for the neck. Simple as that!
* Mine turned out very baggy, so I added a wide belt, which also added some fun color. I'm happy with it.
There, isn't she cute?
Another warning: Don't hand her to a 4 year old. I am OK with my 7 year old carefully handling them, but I will not let one loose in her room unsupervised. They will hold up to posing in a nice dollhouse, but not to being stepped upon by Dad.
____________
* Polymer clay comes in several brands and styles. I've used most of
them, and while you can make this project successfully with any, there's
no denying that they are different.
Your cheapest options are original Sculpey, with the Michael's store
brand coming in even slightly under that. Both of these clays are super
soft: they're ready to go straight out of the package. On the flip side,
sometimes they are too soft and sticky for fine details. They also tend
to bake up with more of a matte, even chalky finish. Durability is less
than more expensive brands.
On the more expensive end is Original Fimo, a much harder clay that
takes a lot of working to get pliable enough to shape. It will be a
challenge for littler kids, and you can expect crumbs all over the work
surface - not to mention the floor! On the plus side, it bakes up with
much shinier finish, and is considerably more durable.
In between is everything else. Fimo has a variety called "Fimo Soft,"
and Sculpey has a variety called "Primo." Both of these
middle-of-the-road options worked well for this project.
And here's a fun fact for anyone who stuck with me this long: 20+ year
old Fimo Still Works! Really! I assumed I would be replacing my ancient
stash a few colors at a time - I mean, I was buying this stuff as a teen
when $2.50 per block still felt really steep. But it still softens up
and bakes just as nice as when it was new. Fimo: The eternal substance!
:)


Comments