Make a Building Kit with Straws and Pipe Cleaners

Once again, I am beginning a post with the disclaimer that this is not an original idea. I came across it in the April 2014 issue of Family Fun Magazine. I don't see a link to it on their site, though, and since we added a few twists of our own I don't feel too bad posting our version here. (I really enjoy this magazine, by the way: it has a lot of fun ideas for kids pre-school through teen years. I think we'll be using several of them from the current issue. Oh, and it's fairly cheap - consider a subscription!)
I was immediately excited about this idea because my almost five-year-old son really enjoys building things. He is really attention-hungry and tends to resist solo projects: I anticipated that this project would hold my interest as well as his, and I was right. (To be fair, it may have held mine even a little better than his!)
It's also low mess, low cost, very simple for the adult, and re-usable. All great features in my book!

Here is what you will need
- Drinking Straws
- Pipe Cleaners
- Scissors (that you are willing to use on pipe cleaners!)
Select the narrowest straws you can find: the friction between the wall of the straw and a double-thickness of pipe cleaner is all that holds your sculptures together, so you want it to be a tight fit.
If possible, find straws without the little bendy bit, since it will be in the way. Or cut it off like we did.
Directions:
My straws were bendy, so I started by cutting a whole bunch of straws just below the elbow, leaving 6 inches of usable straw.
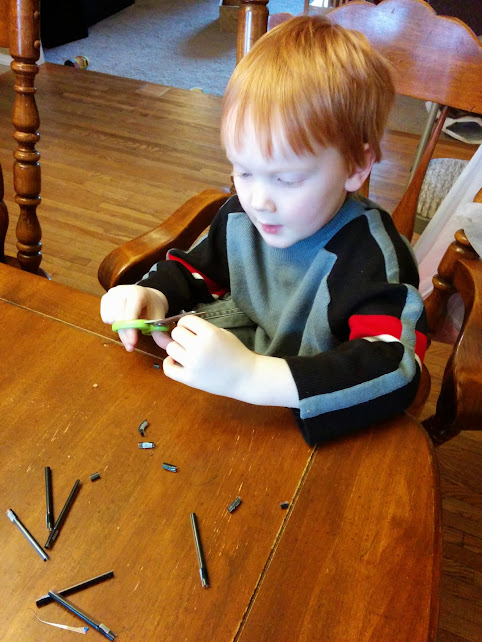
The straw scraps I handed to the kids with a pair of safety scissors. We haven't done much cutting yet, and straws come highly recommended as an early cutting activity.
Sure enough, my three-year-old entertained herself for a long time chopping the scraps into even smaller bits, laughing when they flew across the room. (Thankfully the baby was napping so I didn't have to spend all my time patrolling the floor for swallowable bits!)
Tip: When we began building we found that 6 inches of straw was a bit much for the larger structures such as the dodecahedron. Consider cutting your straws to 4 inches (as the original directions suggest), or if you've managed to find a bend-free model, cut them in half. Do leave some uncut, though, as you may want to expand your building set later. (See below.)
Next, I cut a bunch of pipe-cleaners into approx. 6 and 3 inch pieces. Not that I measured: I just folded the first cleaner into thirds and cut off the top third. After that I used my original as a template and went to town.
 |
 |
To create the T-connector, place the short section at right angles to the long section, position it in the center, and fold a hook over the long section. Then fold the bottom up. Finally, fold the left and right sections of the long cleaner into the center.
Tip: These do Not have to be perfect! Taking a moment to twist the ends together will help with re-usability, though.
Start Building

That's It: you now have all the pieces you need to make a whole variety of shapes!
If your troops are getting restless, you can build a basic pyramid with only four connectors and 6 straws. Take a break and show them how to build by sliding the T-connector into the end of a straw while you make more connectors.

Tip: By this time my three-year-old was done cutting up straw bits, so I encouraged her to string them onto an extra pipe cleaner. She was far more interested in this than building and created a whole jewelry set by the time we were done.
Taking it Further

After making a pyramid, cube, and finally a rather floppy dodecahedron (pentagon-shaped faces), we were ready to branch out. (And by "we" I mean "I," as my four-year-old would have been happy to abandon the court for some TV time. I, however, persisted!)
My son and I noticed our cube was pretty floppy even with 6 inch sides. I also noted that the 9 inch uncut straws were almost exactly the right size to serve as cross-bracing. (Technically they should have been more like 8.5 inches, but frankly there's plenty of flop in this project!)
Clearly what we needed were some four sided connectors.
Of course, I'd already cut up most of my pipe cleaners, so I ended up making some with the 6 inch pieces, some with 3 inch pieces, and some with 5.5 pieces. Had I been planning ahead I would have made them all with 5.5 pieces just for the sake making exactly one connector per cleaner. However, all three sizes performed just fine.

Using the four-sided, or "X" connectors as my son dubbed them, we were able to build a house as well as a (partially) cross-braced cube.


By the time we'd got this far, my son really had lost interest, but I have plans to create 5 and/or 6 sided connectors next time we play with these and see just what sort of fun stuff we can create using primarily triangles.
All in all this was a really fun way to spend about 90 minutes with the kids, and since everything comes right apart and packaged up compactly, I expect to pull it out many times in the future. I also suspect it will grow with the kids quite nicely: it could be a real boon when teaching geometry - not to mention structural engineering!


Comments