Family Flash Cards for Toddlers
Wow, I see from my last posting date that it's been eons since I had a free brain-cell or two to do any crafts (scrapbooking aside), let alone tutorials. But fear not: today's entry is a very simple little project that makes my toddler happy.

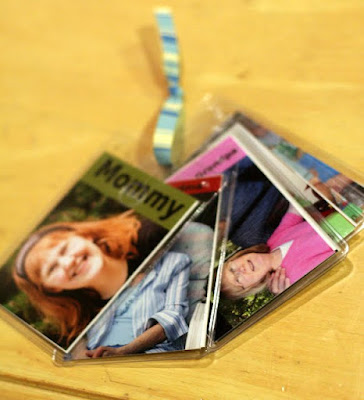
My son has a whole boatload of cousins, uncles, aunts, plus grand and great-grandparents who live in Florida or Texas, and I want him to at least see their faces from time to time so we don't forget they exist. So, I made him a set of "flash cards" of both his local and cross-country family members. It's clipped to his diaper bag or other handy location so he can play with it anywhere.
Materials

- Photos of baby's favorite people, labeled and printed at 3x4 inches
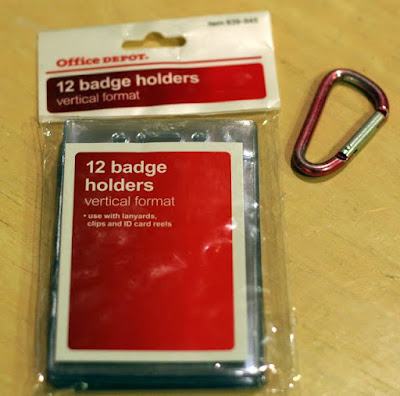
- 1 pack of vinyl badge holders, vertical orientation, size 3x4 inches. *
- 8 or so inches of 1/4 inch wide ribbon
- Small carbiner clip or plastic link from the toy box
* I bought GBC brand badge holders from Office Max, 12 for $5. I see on their website they have many more options than that had in store with considerable quantity discounts.
The plastic is a little more rigid than I would prefer: I think my boy will eventually crimp or even break them. Also there's an irritating "GBC" embossed stamp on the back.
Office Depot sells some in a softer vinyl at the same price; however they're smaller than 3x4 - at an estimate, 2.5 x 3.5. If you get them, you'll have to measure and resize your photos appropriately.
Tools
- Software for editing photos
- Scissors and/or paper cutter
Skills
- Semi-advanced photo editing or "digi-scrap" abilities
Steps
(I use a free image editor called Gimp for resizing, rotating, labeling, color correcting, and sharpening my photos. These instructions are written assuming you're using it or one of its commercial competitors such as Adobe Photoshop Elements, Corel PaintShopPro, etc.
Don't own one of these and no time for the learning curve? Alternate instructions for using Google's very simple and free Picasa software are at the end.)
1. Using the image editing software of your choice, resize a *copy of* your photos to 3x4 inches at 300 dpi, or whatever dpi you or your lab prefers for printing.
2. Add a solid bar somewhere on the photo where it doesn't get in the way, and label each photo. I used the "Sans Bold" font.
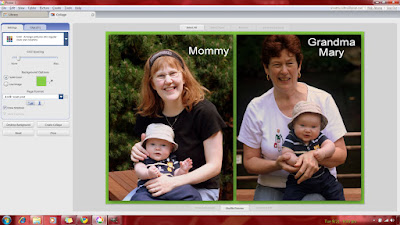
3. Happily, you can fit exactly 2 3x4 photos on a 4x6 print. Rotate all of your photos to Portrait orientation, enlarge the canvas of 1/2 of them to 4x6, and paste in the second photo.
Your images will be laid out something like this:

4. Assuming that, like me, you've sworn never to own another ink-jet, upload your photos to your favorite lab, i.e. Costco ($0.13 for each 4x6 print)
5. Wait one hour, run up to Costco, pay them about $0.90 for your prints, and grab those diaper wipes they've got on sale on the way out. Oh, and stop by the food court for one of their $1 mochas. Much happiness!
6. Back home, carefully trim each photo in half with your scissors or paper cutter. Arrange each pair back to back and slide them into a badge holder.
(Note: I found that my holders were a hair under 3 inches wide in practice. I sliced an extra 1/16th to 1/8th of an inch off the long edge of each photo and was able to load them much more easily.)
7. Loop your ribbon through the whole deck and tie a knot at the top. Thread your carbiner or toy clip through the ribbon, and hand to your kid. Watch with satisfaction as he quickly locates the picture of Grandma and exclaims over it
Alternate instructions for Picasa users
1. Select your first photo, crop to 4x6, and use the Text tool (Basic Fixes tab) to add a label. You can't add a solid colored box as in my images, but you can change color, font. and even transparency to your heart's content.
2. Repeat for each additional photo.
3. Rotate every photo so that it is in Portrait orientation (that is, short edge horizontal, long edge vertical.) Do this even if the photo itself is in Landscape orientation.
4. Select your first two photos. Choose the "Collage" button (bottom center, or under the "Create" menu at the top.)
5. In the Collage creator, choose the Mosaic or Grid option. Under "Page Format," choose "4x6: Small Print." Play around with the grid spacing and other options. When done, click "Create Collage." Picasa saves your image to the Collage album, which you can locate afterwards.

6. Repeat for each remaining image pair.
7. Follow steps 4-7 from above to complete your project.


Comments