Thursday, May 28, 2015

Math Circles on your Geo Board


During a Pinterest binge last week, I came across an interesting activity for teaching multiplication and skip-counting on KidsActivityBlog. The patterns created by connecting numbers across the circles really caught my eye and I figured my six year old would be interested too.

However, it's terrifically difficult to get him interested in worksheets, I wasn't sure that I could manage the activity outside (or that the weather would cooperate), and I always love to come up with ways to do something reusable. After a few moments of brainstorming, I thought of our Geo Board, currently languishing in the attic since I'd gotten tired of tripping over it on my son's bedroom floor some months before.

Of course, I did not want a square: I wanted a circle! More specifically, a circle with exactly 10 evenly spaced pegs around its circumference. This is not something you can achieve with a pure grid pattern - at least not at a size still useful for the rubber bands we own. Besides, the pegs not in use would be in the way.

Thankfully, while our original board was made with dowels glued into the holes, I'd updated it some time ago with nuts and bolts, which have the bug/feature of being removable. It took a little experimentation, but I finally figured out which bolts to move and which to remove entirely.
I didn't really want to write on my board, so I stuck some masking tape near each bolt and wrote on it. Since we're also working on the concept of even and odd, I made the even numbers red and the odd ones blue. Check out the photos below for the peg layout.
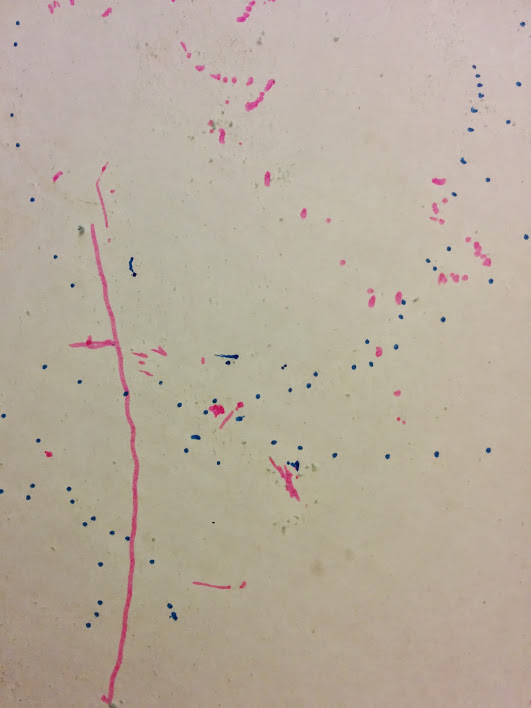
This pattern is formed when counting by 4

This pattern is formed when counting by 3

This pattern is formed when your four-year-old comes by after the math lesson is over

A couple of  notes:

  • You might notice I have the bolts facing the opposite direction - bolt head rather than nut side showing. I was just lazy - it was easier to place them in that direction when I was experimenting and I didn't get around to flipping them back. I actually don't recommend it because there's not enough space to attach several bands. 
  • We went back to mostly standard rubber bands for this project. The cloth bands are fine, but not always just the right size. Now that he's 6, rubber bands are just as easy to use. 
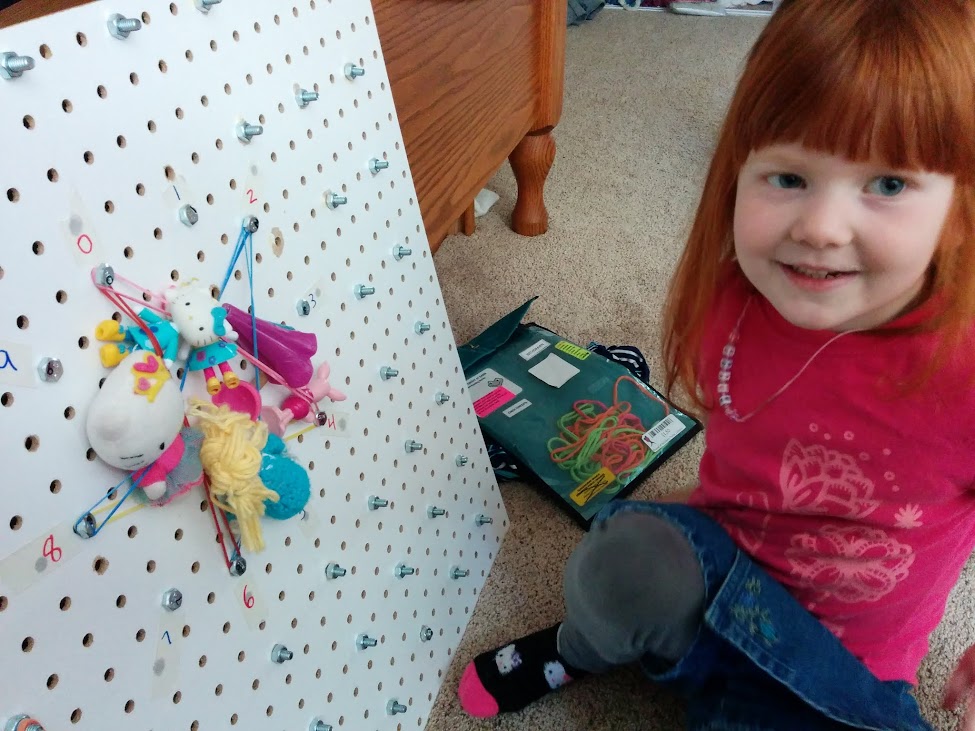
  • As always, things didn't go quite as well as they do on Pinterest the first time I introduced the activity. You see, they hadn't played with it in Months and it was basically brand new again. They were all far more excited to make various pictures (especially "guitars") at first.  I forged ahead anyway and he was Sort Of interested. A day or so later he was again, Sort Of interested. But then this morning he saw it at the foot of my bed and he asked to make number patterns. He was sincerely interested through both of the iterations shown above. Note to self: Be More Patient! He's quite possibly absorbing more than you think! 


Thursday, May 14, 2015

Reverse Applique T-shirt


I noticed a hole in one of my four-year-old's T-shirts a laundry cycle or two ago, and while contemplating whether to ignore it, throw out the shirt, or settle for a couple of ugly stitches, I remembered a technique I learned way back a couple of years BC (before children) called Reverse Applique. I learned it from the "Alabama Stitch Book," which I highly recommend - I borrowed my copy from the library!
In Reverse Applique, you tack a piece of contrasting fabric on the wrong side of your garment, stitch your pattern through both layers, and then carefully clip out the shape from the front of the garment.
Here's how I used the technique to replace the unsightly hole on my daughter's shirt with a much larger, but (and this is key) now decorative hole.

Materials

  • Garment to decorate (must be non-fraying knit fabric - i.e. jersey knit) 
  • Scrap of fabric of similar weight and weave in a contrasting color
  • Thread in a contrasting color to the base garment (sewing or quilting thread would be ideal, but I always end up using two strands of embroidery floss 'cause I have so many colors.) 
  • Pins and a needle
  • Very sharp scissors. (Ideally tiny embroidery scissors, although since I couldn't find mine I made due with my sewing scissors.) 
  • A disappearing fabric marking pen. If you don't have one, chalk or even your kid's washable markers would probably also work. 

Directions 

  • Using your fabric marker, draw the pattern you plan to stitch on the front of your garment. I used a simple heart which I was able to free-hand. If you want something more complicated you can cut out a shape to use as a stencil to trace around.  You could even use fabric transfer paper, which works like carbon paper, to copy a design you've printed out.
    Hint: If you're using a disappearing marking pen, keep in mind that it will, in fact, disappear! It may not last overnight, or even more than a couple of hours, so don't draw until you're ready to stitch.
    Hint 2: It is not easy to draw on stretchy jersey knit fabric. I often end up drawing a series of dots so I don't end up dragging things out of shape. 

  • Cut a piece of your contrasting backing fabric that is large enough to cover your entire design, leaving at least 1/2 inch margins all 'round. 
  • Now, turn your garment inside out, and pin your backing fabric in place - again, making very sure that you overlap your design on all sides by at least 1/2 an inch. This is often the trickiest part since you can't see your design. I often end up having to correct it two or three times, but it really is important to get it Just Right. :) Also, be sure that you are not stretching either the garment or the backing fabric. 
  • If desired, stretch the work area of your garment out using an embroidery hoop. I never bother. However, I usually do stick a piece of cardboard inside the shirt so I don't accidentally stitch the front and back together. 
  • Using a basic running stitch, carefully stitch around your design, making sure that the stitches are small and even. Remember that you will be clipping out the inside of your design, so it is inadvisable to double back on yourself or stretch your thread across the design. 
  • Now, using your sharp scissors, carefully snip a hole in the Top Layer of the fabric and cut around the interior of your shape, leaving 1/4 inch of margin from your stitching. 


  • Flip the garment inside out and trim around the edges of the backing fabric. 

And that's it: you're done! 

I added a third heart on my daughter's shirt to balance the design. She was pretty excited about it! 

Tuesday, May 12, 2015

Lego Tip: Sort Bricks with a Salsa Tray


This one pretty much speaks for itself! My 6 year old son needs to sort his bricks when building a larger kits, but despite clearing out my plastics drawer, we haven't found anything we Really liked until I picked up this salsa tray from the local Dollar Tree. The rounded edges are especially nice for quickly moving pieces from slot to slot: when I'm helping I like to dump a whole bag into the center and just slide everything into the appropriate section. Of course, it's not very compact, but we usually have a shelf somewhere we can store it on in between building sessions.

Monday, May 11, 2015

Quick n' Dirty Doodlebot


Last week during a visit to the local science museum (OMSI), my middle daughter and I built a "doodlebot" out of a little stepper motor, a battery, a hunk of Styrofoam, and a few other things. My son had one of his idiosyncratic attacks of stranger worry and didn't do the project with us, but Grace and I had so much fun that I filed the project away as something to try at home. I immediately found plans for a "DoodleBot360" on Instructables, but as per usual I wanted to make it even simpler.

At its simplest, these "bots" consist of a platform that holds a pen just barely in contact with the surface, propelled by some sort of motor. So you should definitely use your imagination to come up with different recycleables to use as the platform and legs. For instance, I thought about using the legs from our "Cooties" game, and at OMSI they used toothpicks. Cardboard would be fine as a platform although it probably won't have as much holding power on the legs: you may have to glue or use sticky-tac to keep them in place.

My 4 year old and my 6 year old built 3-4 different models in about 30 minutes using these materials

Both models

  • Narrow Crayola markers

Style 1 (Similar to Instructables DoodleBot360) 


  • A motorized toothbrush from the Dollar Tree
  • A plastic lid from a large tub of yogurt
  • A hole punch
  • Electrical tape

Style 2 (Similar to OMSI's doodlebot) 


  • A milk frother from Ikea (under $3 and used daily for my morning coffee!) 
  • A section of a green floral brick from the Dollar Tree
  • A rubber band
  • Several golf T's 

Instructions for Style 1

  • Mark three roughly equidistant spots around the edge of the yogurt lid, and use the hole punch to punch through. 
  • Take the caps off three markers and insert them into the holes.
    By pure luck, our standard hole punch made holes just exactly the size of our markers, and the ridge on the marker where the lid stops was enough to keep them in place. I was prepared to use sticky-tac to hold them steady otherwise. 
  • Lay the motorized toothbrush across the lid and attach it with a piece of tape

Instructions for Style 2

  • Cut a green floral brick into quarters (length and width-wise) using a bread knife
  • Insert 4 (or more) gold tees near the corners of the brick. I placed mine so the bot would stand on the wide part of the tees; Grace chose to put hers all the way through so the bot stood on the points. Both methods worked fine. 
  • Somewhere in the vague center of the brick, shove one or more pens into a hole started with a golf tee.  Carefully push through just to the point where the tips touch the surface. 
  • Lay the coffee frother across the brick and hold in place with a rubber band or two. 
To play, get a large piece of paper or cardboard (we used the cardboard circles from our pizza last night!) and carefully turn on the motor while holding the 'bot above the surface. Place 'bot in the center of the drawing area and let it go. Make any minor adjustments necessary to keep the pen in contact with the paper, and be ready to catch the 'bot before it runs off the drawing area. 

Results

When used with the toothbrush motor, both styles of 'bot generally wanted to move in a circle. The coffee frother had a considerably larger oscillation - one of the two we used was actually bent, which made for a Very wild motion. Bots using this motor tended to draw dots over a large area of the paper, and it was challenging to keep the pen in contact with the surface.
The circular 'bot was the most stable and drew the most regular shapes. 
The foam brick bots were probably more fun, though, and certainly allowed for more steps to be performed by the kids.